NetBeans is one of the most popular development IDE for Java developers. But it can be used for many other technologies: C/C++, PHP and web development. And of course, with some plugins, it’s perfect for develop Angular 2 applications as well. In this article I’m want to describe you how to set up an Angular 2 development environment with the combination of NetBeans IDE & Node.js & Angular CLI and Grunt. Each technology described separately paragraphs.
NetBeans 8.2
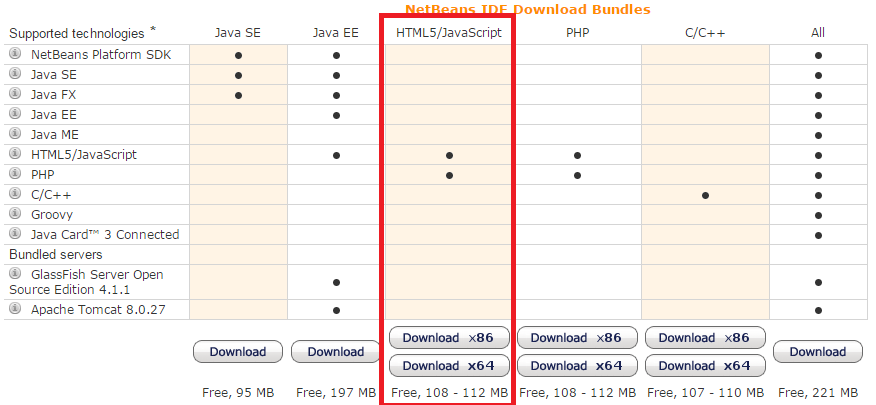
First let’s start with the IDE. Visit netbeans.org to get it. Navigate to downloads and select the version you want. As a Java EE developer, I prefer the Java EE version, which contains the HTML5/Javascript support.
NetBeans TypeScript support
Angular 2 based on Typescript, so we need a plugin for NetBeans. Download the plugin through the download link below this sentence.
Plugin descriptionhttp://plugins.netbeans.org/plugin/60605/typescript-editor
Download URL: https://github.com/Everlaw/nbts/releases
The NetBeans Google Chrome extension
NetBeans also have a Google Chrome plugin for supporting Web application development & debug. To debug / enable auto refresh on an HTML file, right click on the selected file, and select “Run File” from the menu items. Then the HTML file appears in a Chrome browser.
Download URL: https://chrome.google.com/webstore/detail/netbeans-connector/hafdlehgocfcodbgjnpecfajgkeejnaa
Node.js
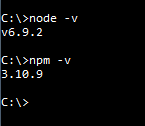
I think I don’t have to present Node.js for anybody. It’s necessary for... everything. For Angular 2, for Angular CLI, and for Grunt too. If you don’t want to use Node.js, stop reading this article :) Download and install it from https://nodejs.org/en/ . To check the success of the installation, open a command line, and type:
node -v
To check Node Package Manager type:
npm -v
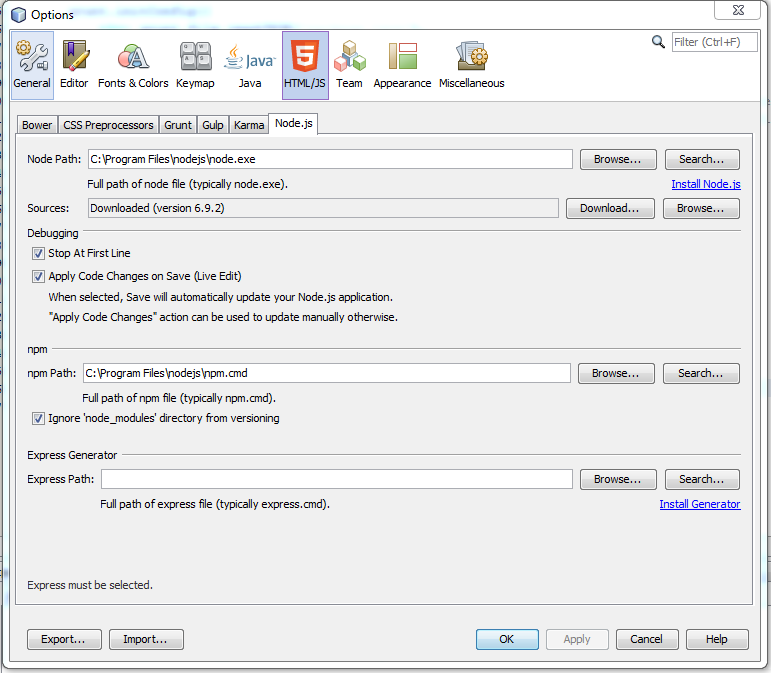
Setup Node.js in NetBeans:
To set Node.js configurations click Tools menu > Options and select “HTML/JS”, then “Node.js”. If Node path, npm path fields are empty, click on their Search button to find the right application.
Angular CLI
We use Angular CLI for creating modules and components through command line. It’s required for creating new web application projects, because the generator process will create all the necessary files we need. Installation:
npm install -g angular-cli
This will install Angular CLI as a global node module. You can use anywhere it with the “ng” command.
The most two useful commands are:
- ng build (builds the application)
- ng serve (Starts the application in a local server)
Grunt
A very useful Node module for running tasks with Javascript. Installation is very simple:
npm install -g grunt-cli
Website: http://gruntjs.com/
Setup Grunt in NetBeans:
To set Grunt configurations click Tools menu > Options and select “HTML/JS”, then “Grunt”. If Grunt path field is empty, click on their Search button to find the right application.


